
Sophie’s Squishies’
baking with sophie.Cinnamon
Whatever is in the cupboard…
Cinnamon & Banana”Squishies” Recipe
quick & easy
I have to admit I’ve never been the best baker, and that’s mostly because I used to have a habit of not following recipes (I may or may not still have this habit)—especially when I’m feeling adventurous in the kitchen. This tendency often results in strange and unexpected concoctions, and has led to the unintentional creation of what I now call “Sophie Squishies.” They’re not exactly what you’d find in a traditional cookbook, but somehow, they’ve become my signature treat. If you’re not a fan of their quirky texture, at least my boyfriend is, and he’s always more than happy to indulge in my accidental baking experiments.
As I continue to experiment with this recipe, I’ll be updating and tweaking this post with any new discoveries. In the meantime, if you try this recipe at home and make any delicious changes that result in a even better squishy , I’d love to hear about it! Feel free to share your tweaks and tips—I’m always excited to learn from fellow bakers.

Your Sweet Escape!
Here’s why you’ll fall in love with these easy “Squishies“:
Quick & Easy – No fuss, no complicated steps—just simple, delicious comfort. A sort of… throw it in situation
Additions – You can add ANYTHING to this creation
Gooey & stodgy – Like a brownie or bread and butter pudding texture.
Freezer-Friendly – Make a batch ahead of time and enjoy them later. Perfect once defrosted with a touch of custard
Crowd-Pleasing – You’ll have everyone asking for the recipe, but luckily, they’re so simple to make you’ll be handing them out left, right and centre.
Like what you see… give me a follow
Beginner Bakers: It couldn’t be easier
This recipe intentionally doesn’t use any raising agents, so if your creation comes out looking flat like a pancake, you’ve nailed it! Perfect for new bakers. The whole idea is to keep things simple and flexible, you can swap out the fillings or add extras like chocolate chips to make it your own. It’s designed to be a grab-and-go treat, much like a brownie or flapjack, perfect for a quick snack or dessert. It also makes an amazing slice of pudding, especially when paired with a generous serving of custard—it’s comfort food at its best!
INGREDIENTS
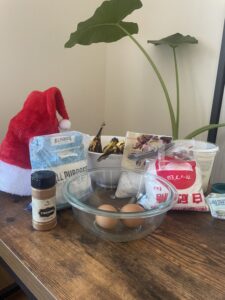
What I used for this bake:
Just a heads up—everything here is based on what I had in the cupboard

Ingredients
Batter
- 180g all purpose flour, plus more for worktops
- 1/2 teaspoon salt
- 40g butter
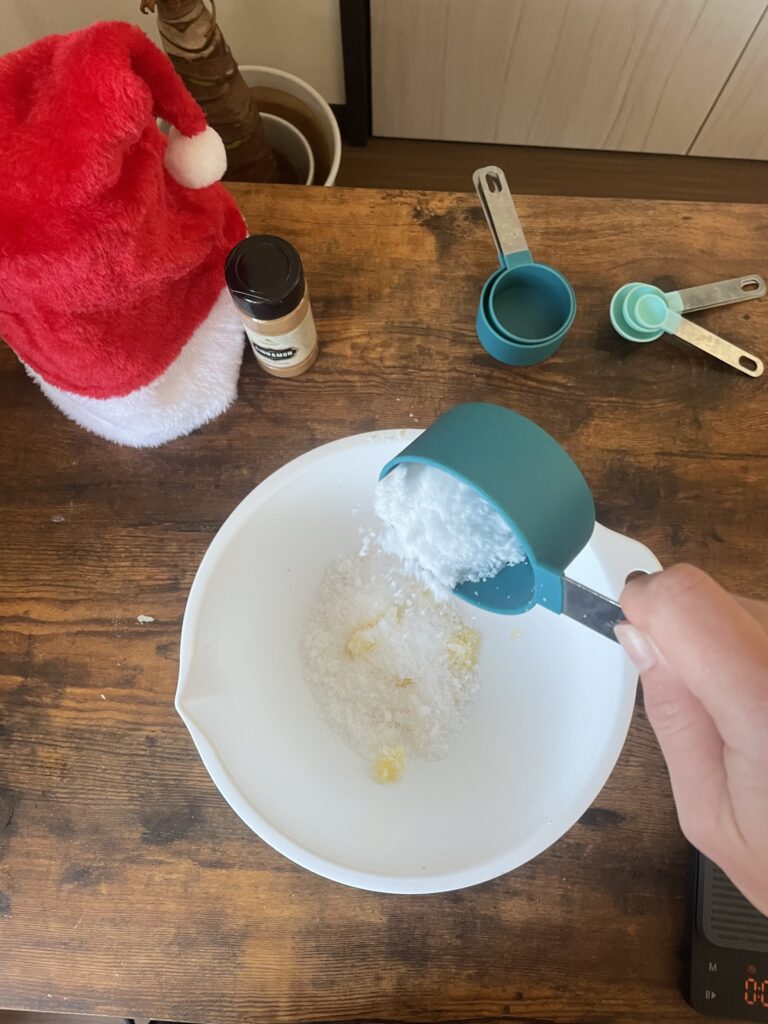
- 50g granulated sugar
- 1 egg
- 2-3 ripe bananas
- 2 tablespoons of cinnamon – add more if you wish
- Table spoon of greek yoghurt
Toppings
- 30g cream cheese – spreadable temperature (beating it will smoothen)
- 10g butter – spreadable temperate (TIP – get this out of the fridge long before starting)
- 70g icing sugar powder – add more if you wish
- Sliced bananas
- Dusting of cinnamon – optional
- Dusting of icing sugar – optional
Instructions
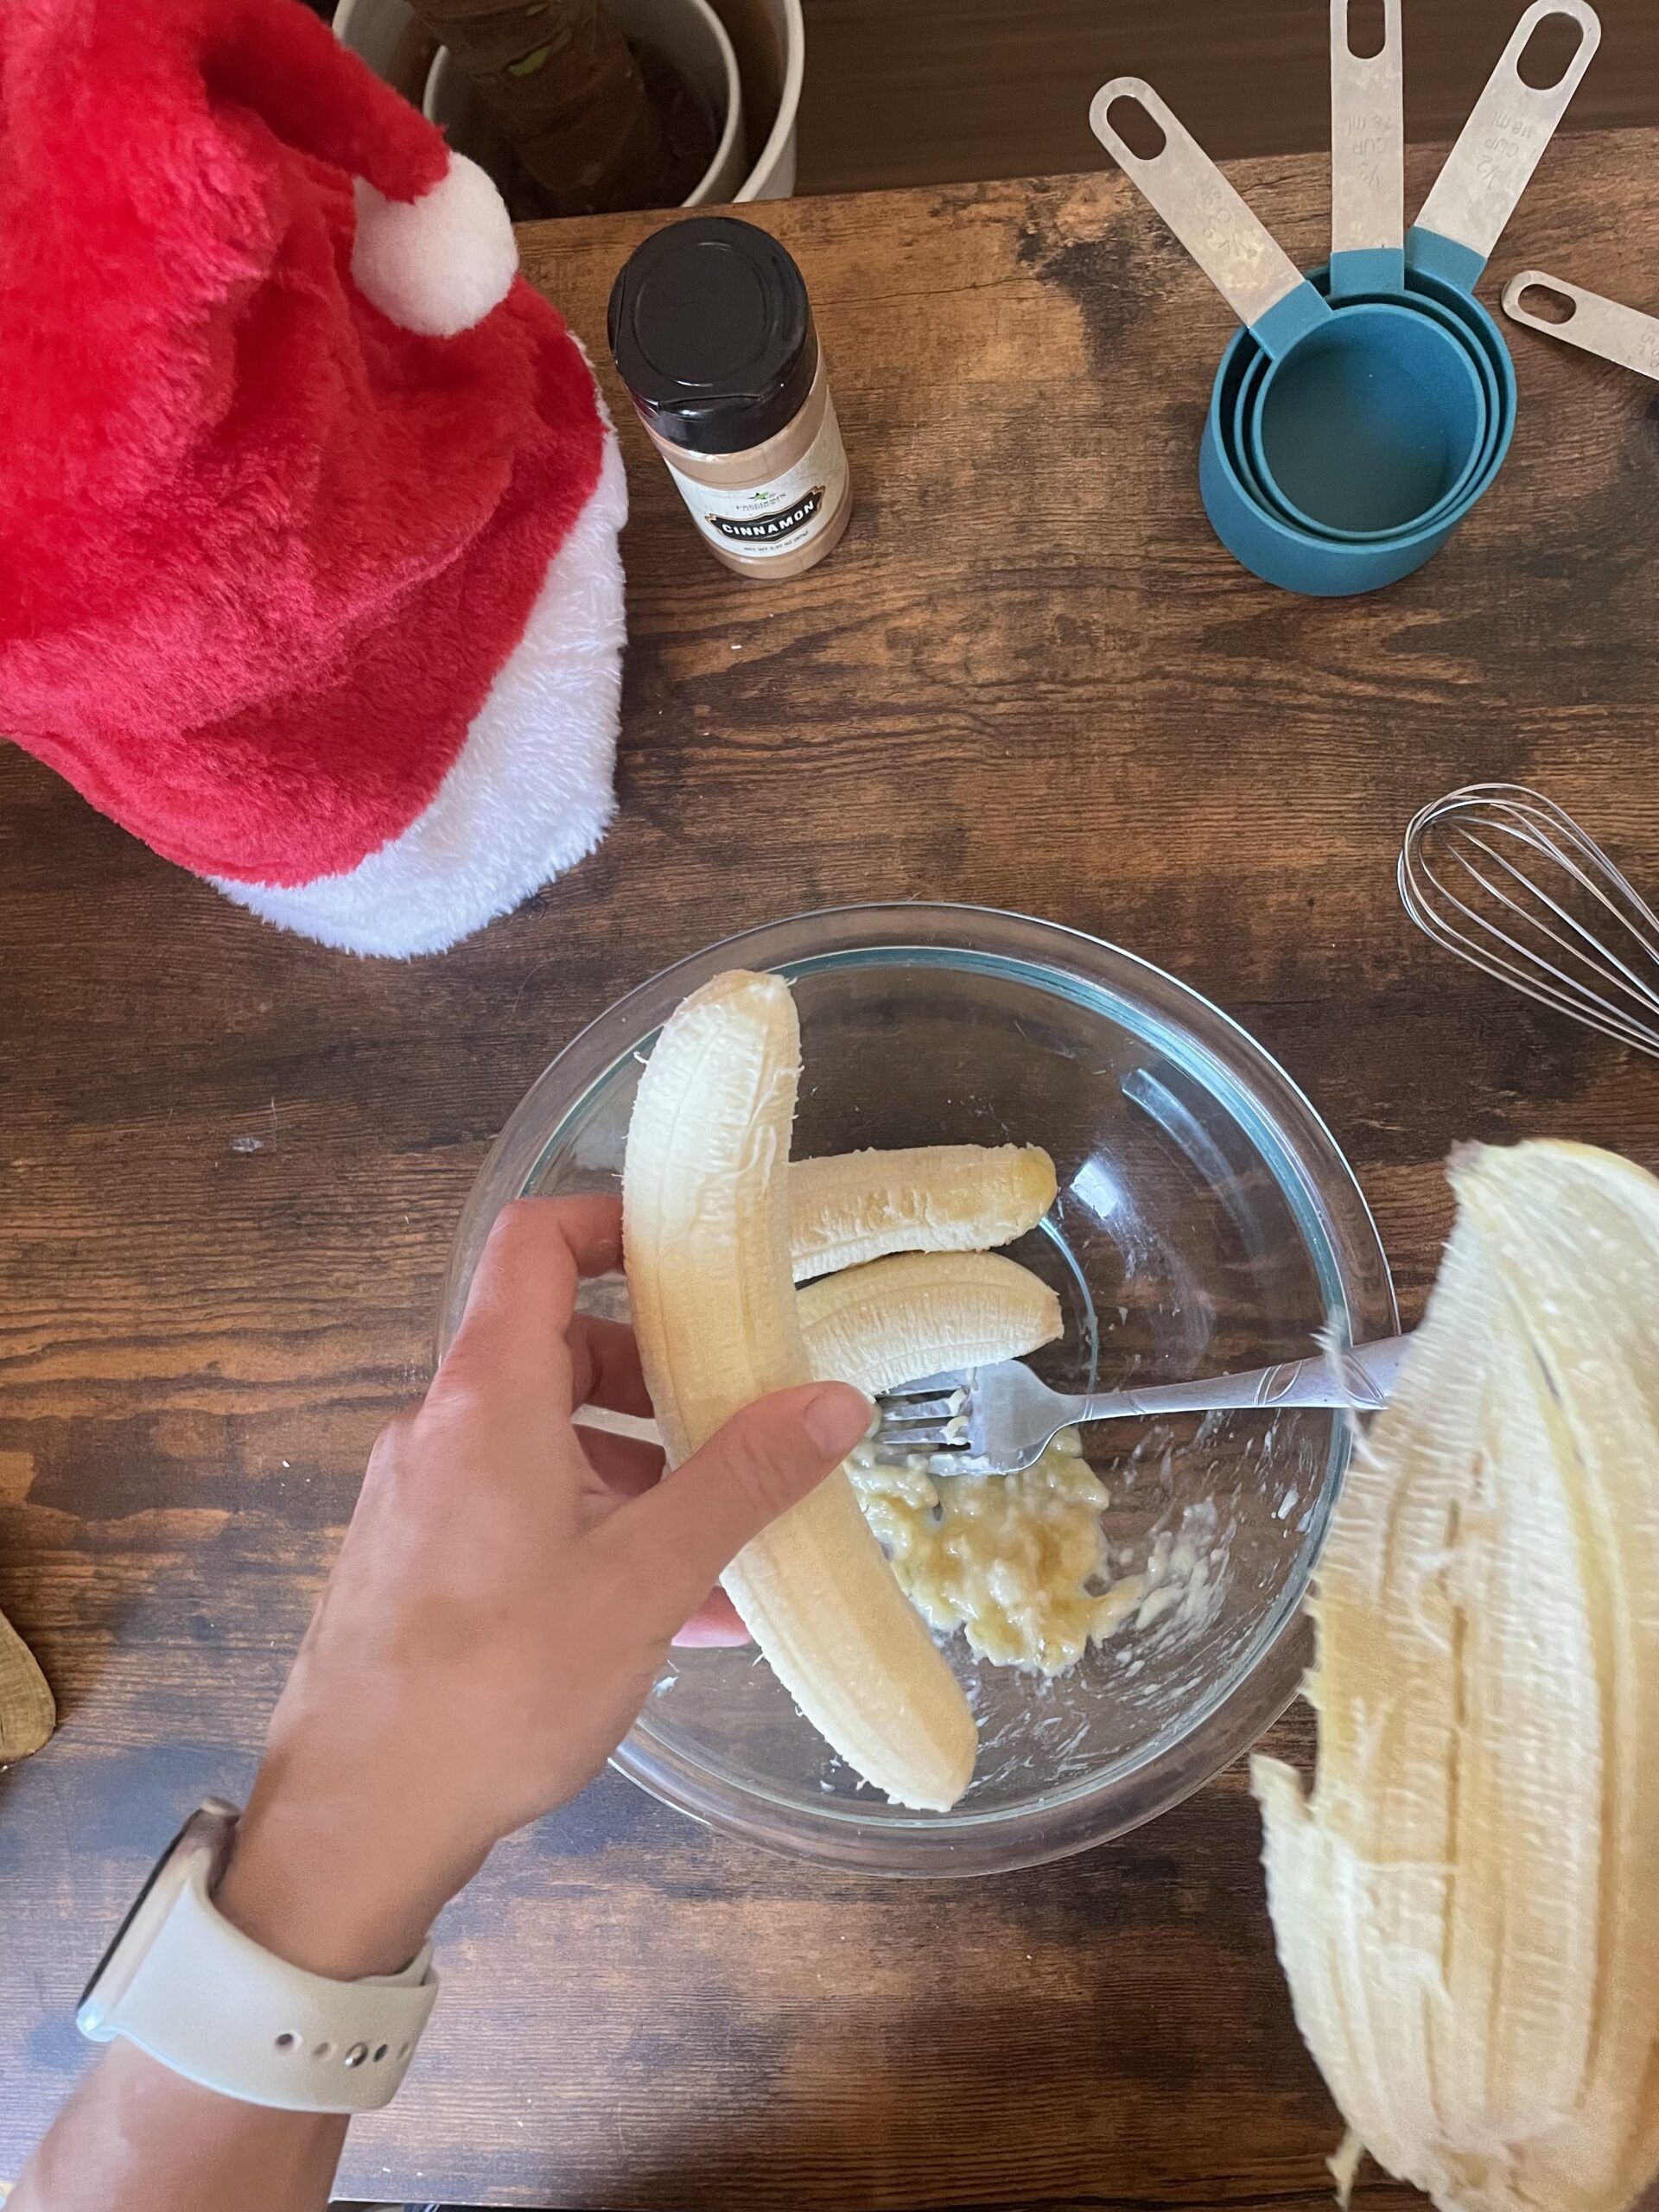
1. Banana batter:
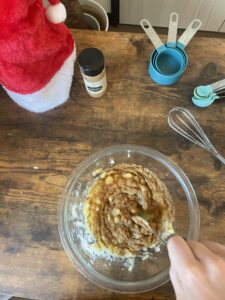
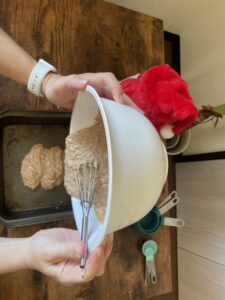
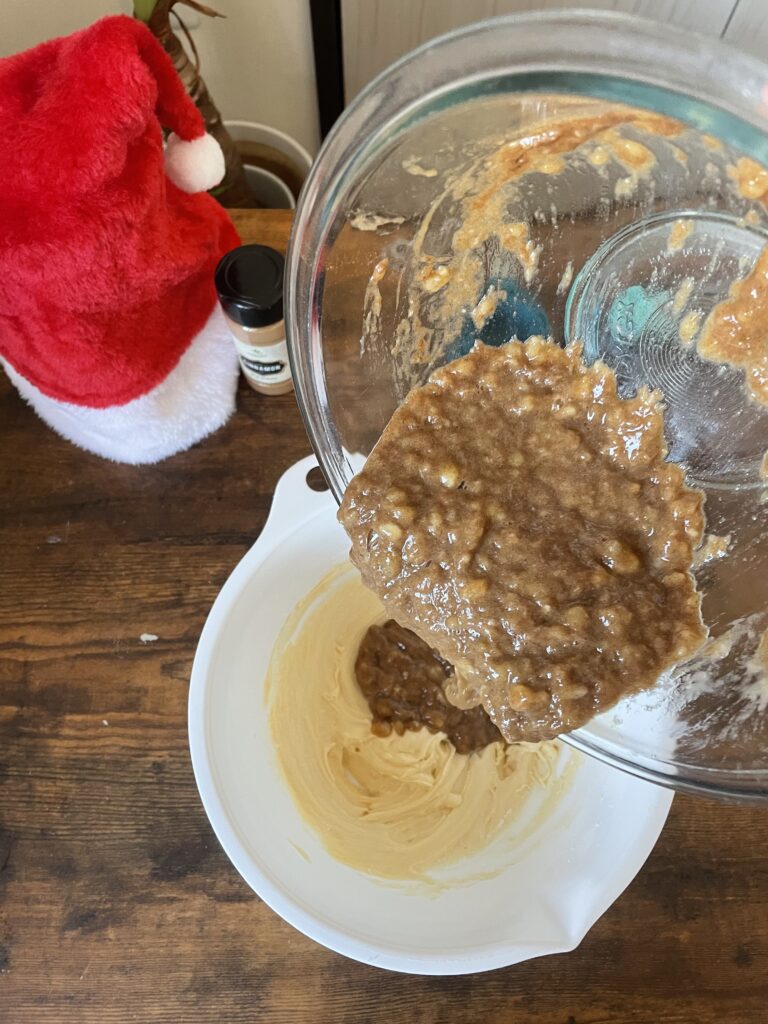
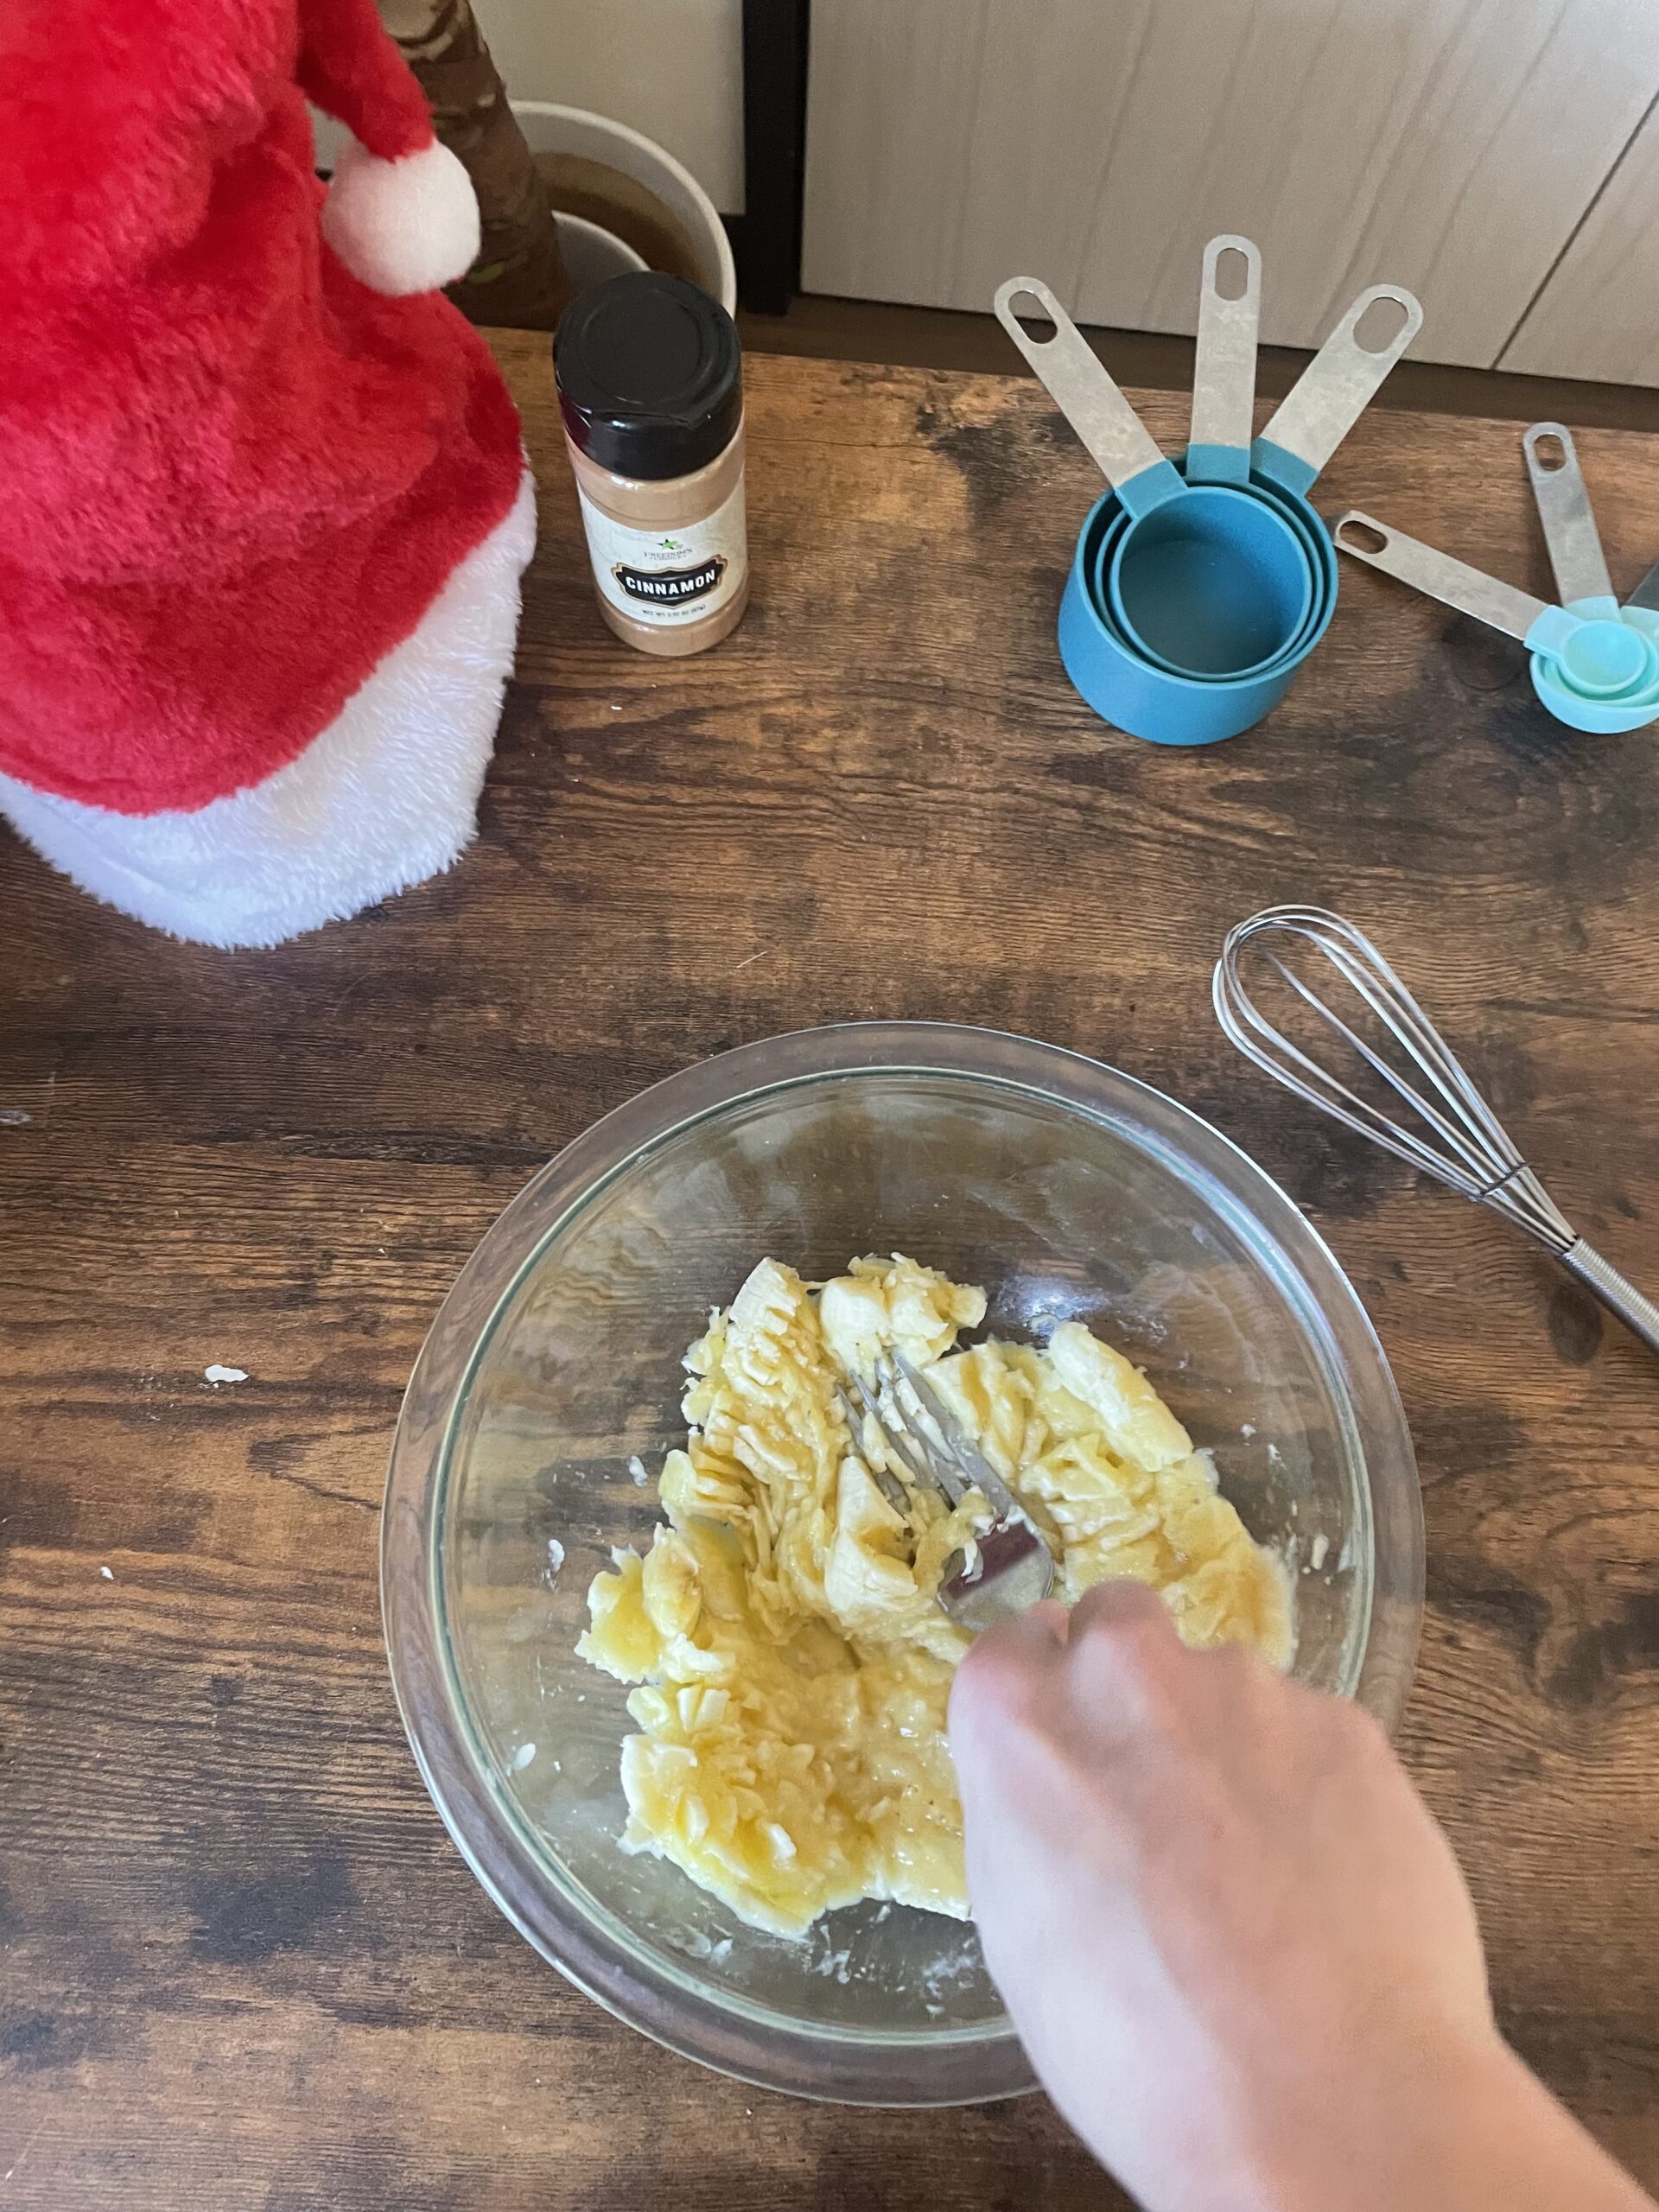
-In a medium bowl, mash up 2 bananas
-Add the cinnamon powder, mix well then set to the side
2. other ingredients:
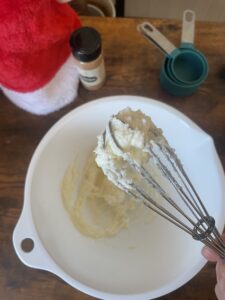
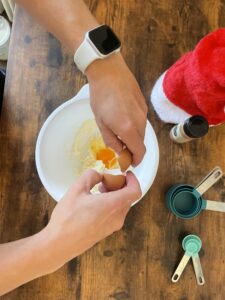
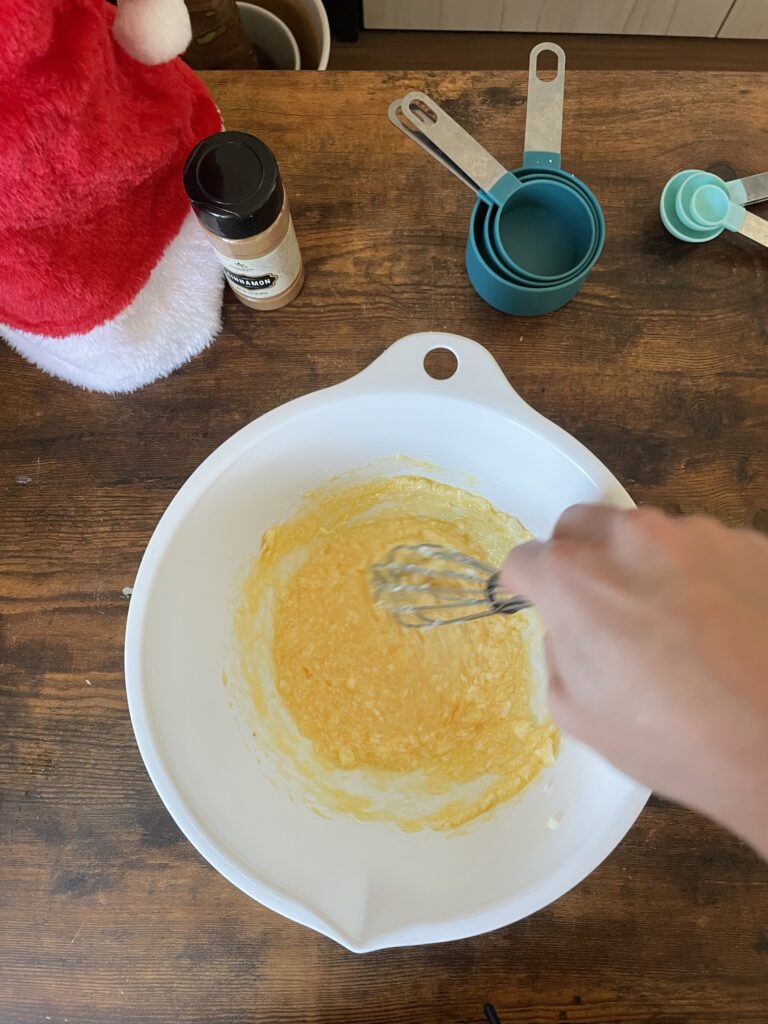
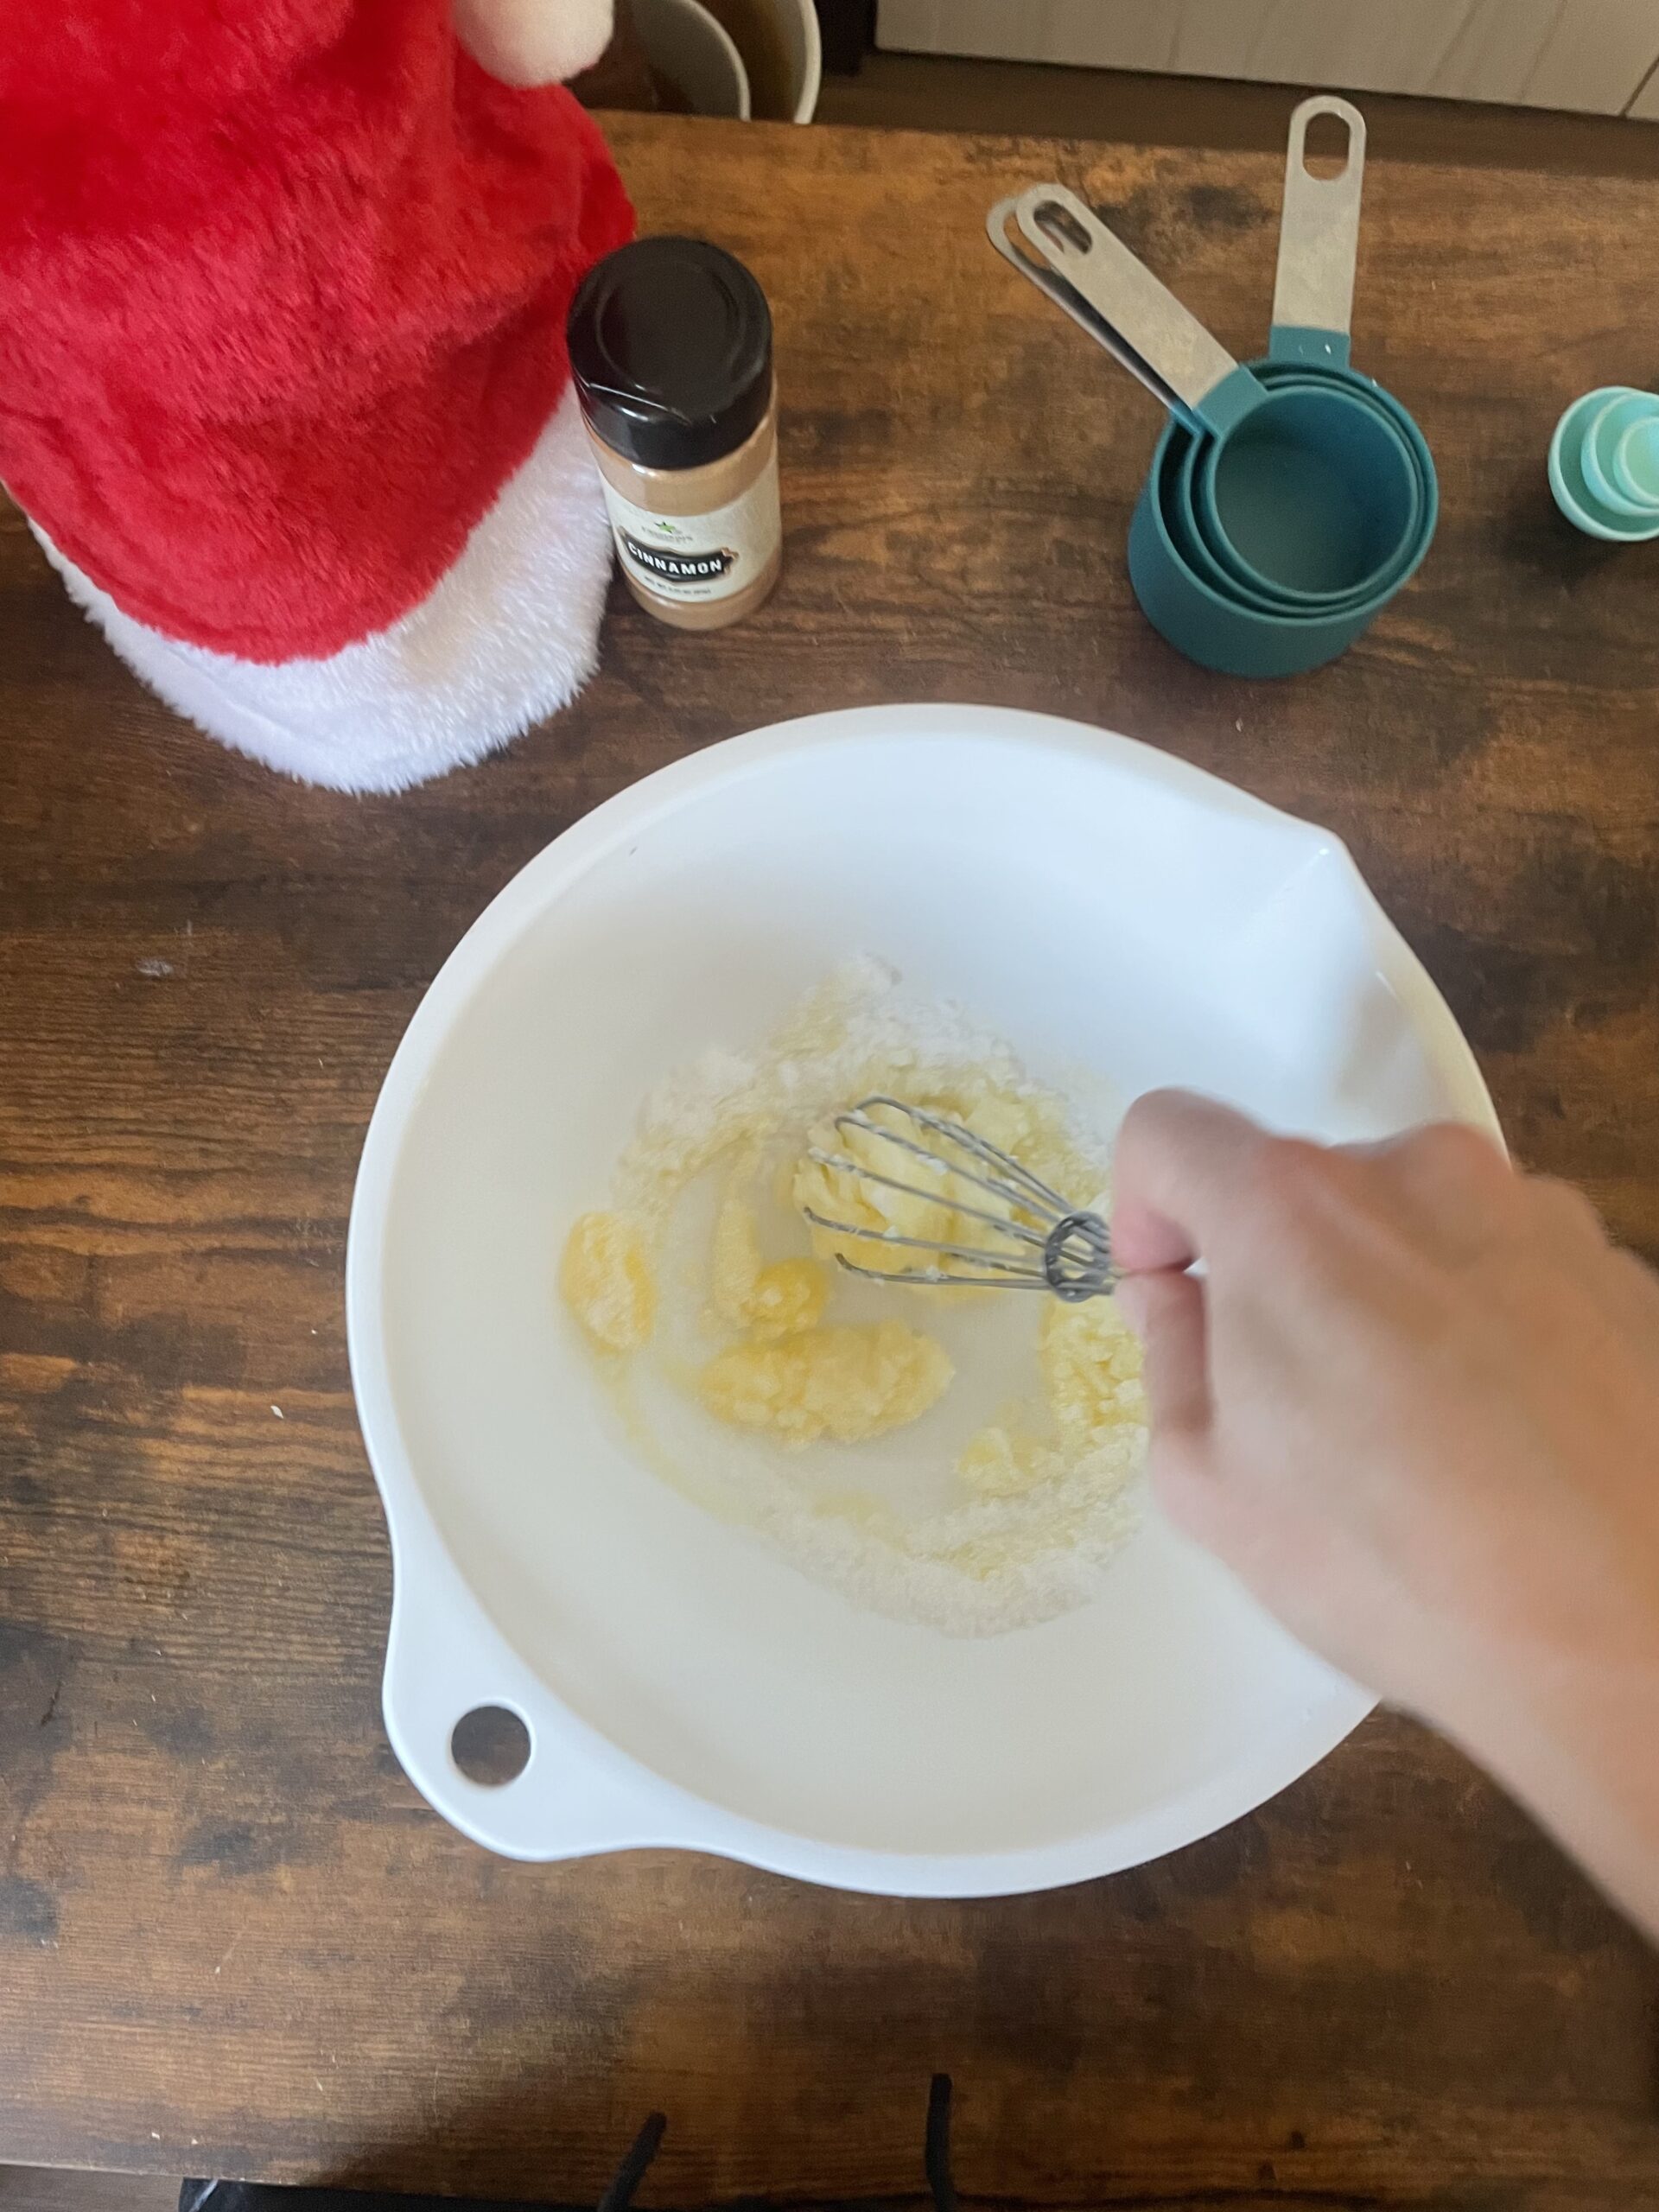
-In a large bowl add the butter and start beating it with a whisk or fork
-Add the sugar and continue to mix until it’s light and fluffy
– Add the egg and keep mixing
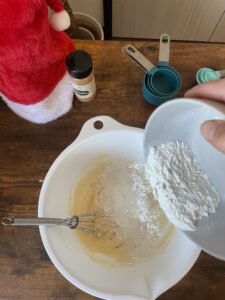
-Incrementally sieve the flour in and continue to mix well until all is combined
3. The mixture:
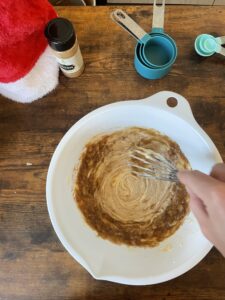
-Grab the “banana batter” and add this to the large bowl
-Add the table spoon of greek yogurt and stir it all in
-Mix until it is all combined


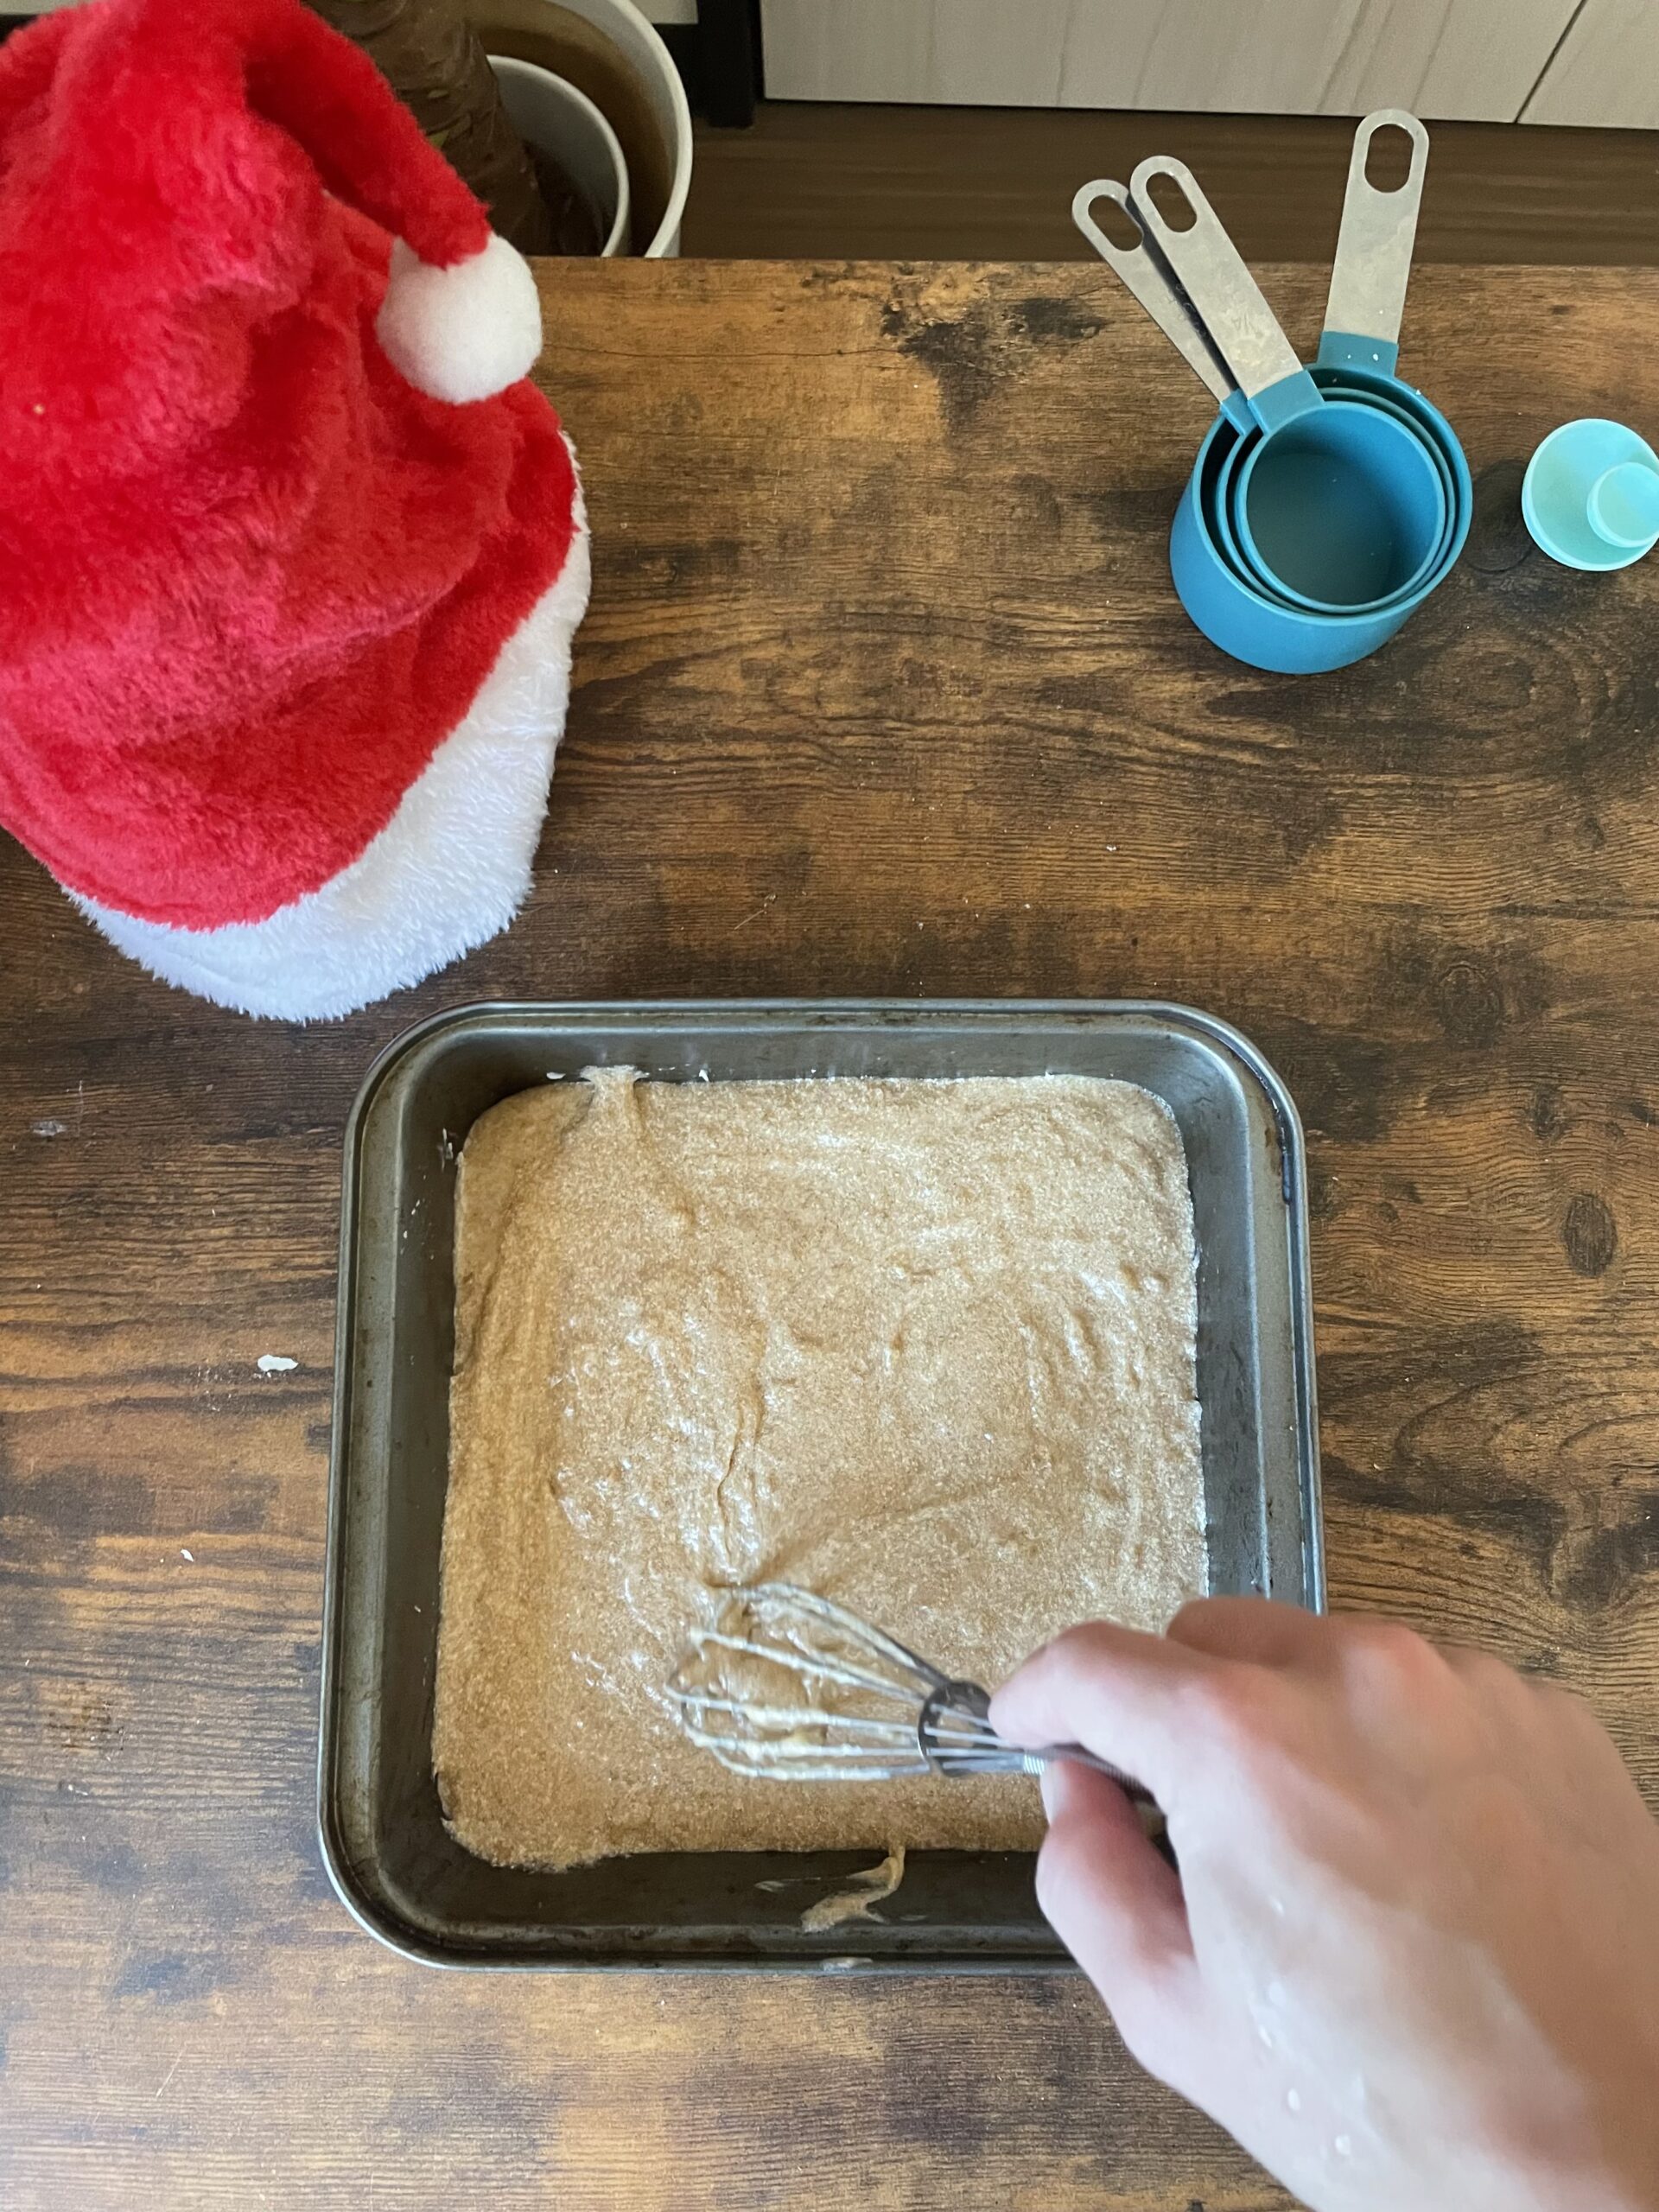
4. Ready to bake:
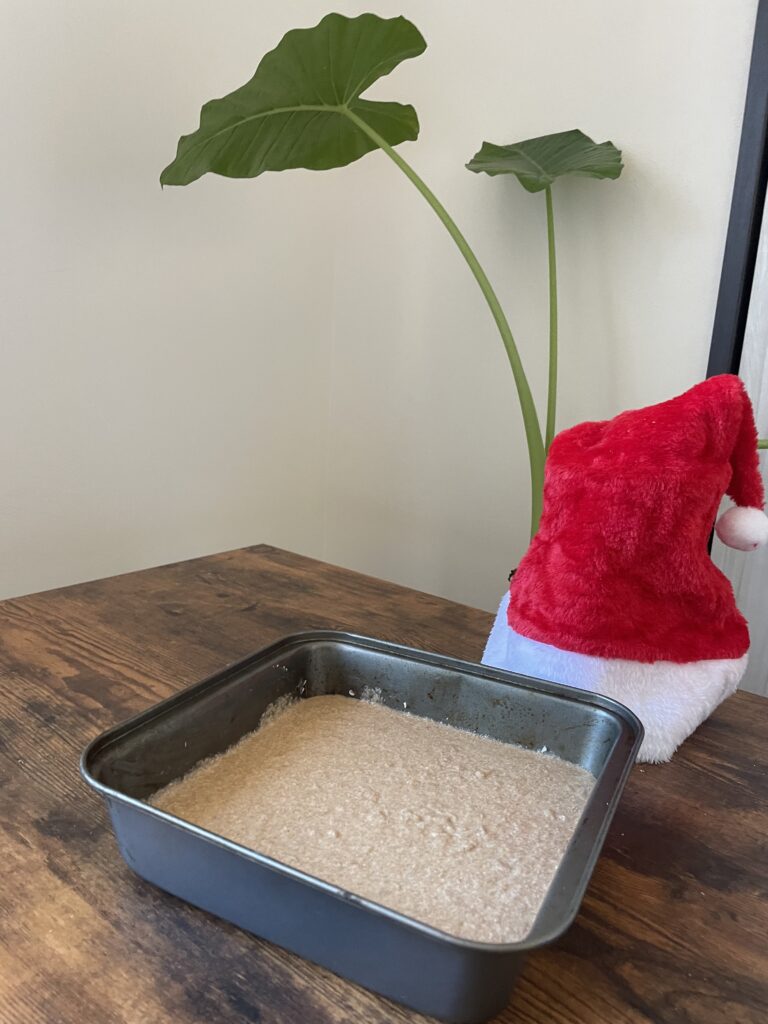
-Preheat the oven to 190°C
-Grease a baking tin (whatever size you think best) with butter
-Pour the batter into the baking tin
-Lightly shake the tin back and forth so the batter lays flat and even. Or with a spatular spread it
-Put in the oven for 15/20 minutes
5. Make the Icing (icing is optional):
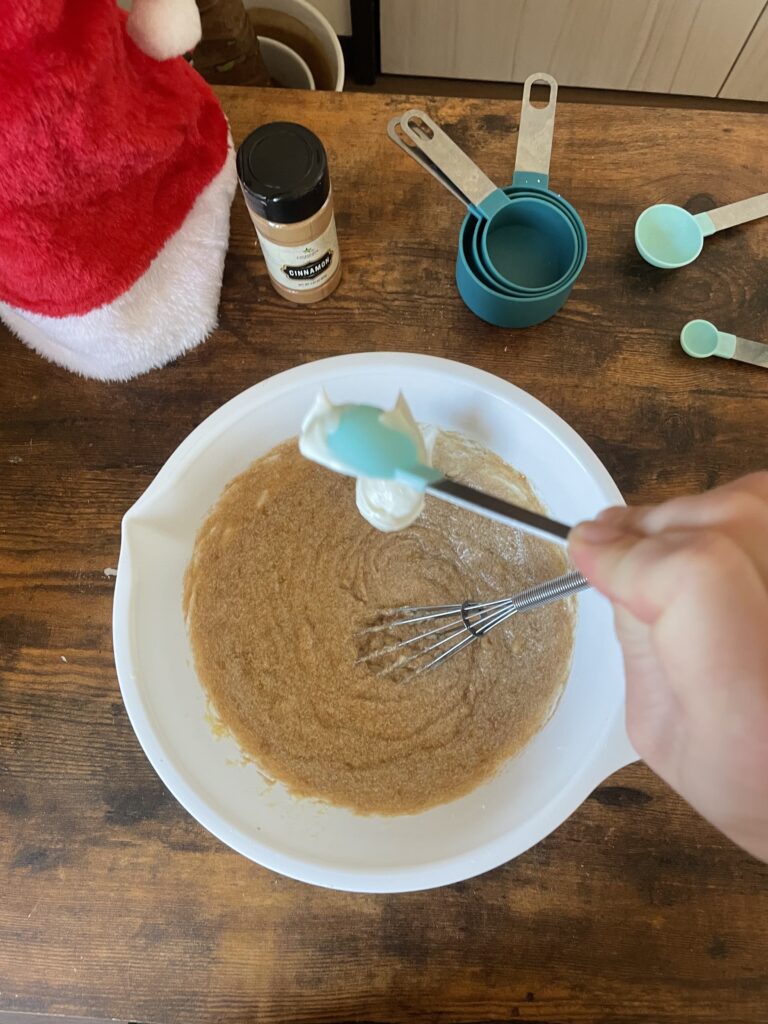
– While the soon to be squishies are in oven: In a medium bowl, beat the cream cheese either by hand (I used a fork), with handheld mixer or stand mixer until smooth and creamy.
-Add the butter and continue to beat until fully combined with the cream cheese.
-Gradually sift the powdered sugar into the bowl until all smooth, fluffy and delicious.
-Once the batter is baked, take the tin out of the oven using hand protection and place it on a wire rack for 10/15 mins to cool down.
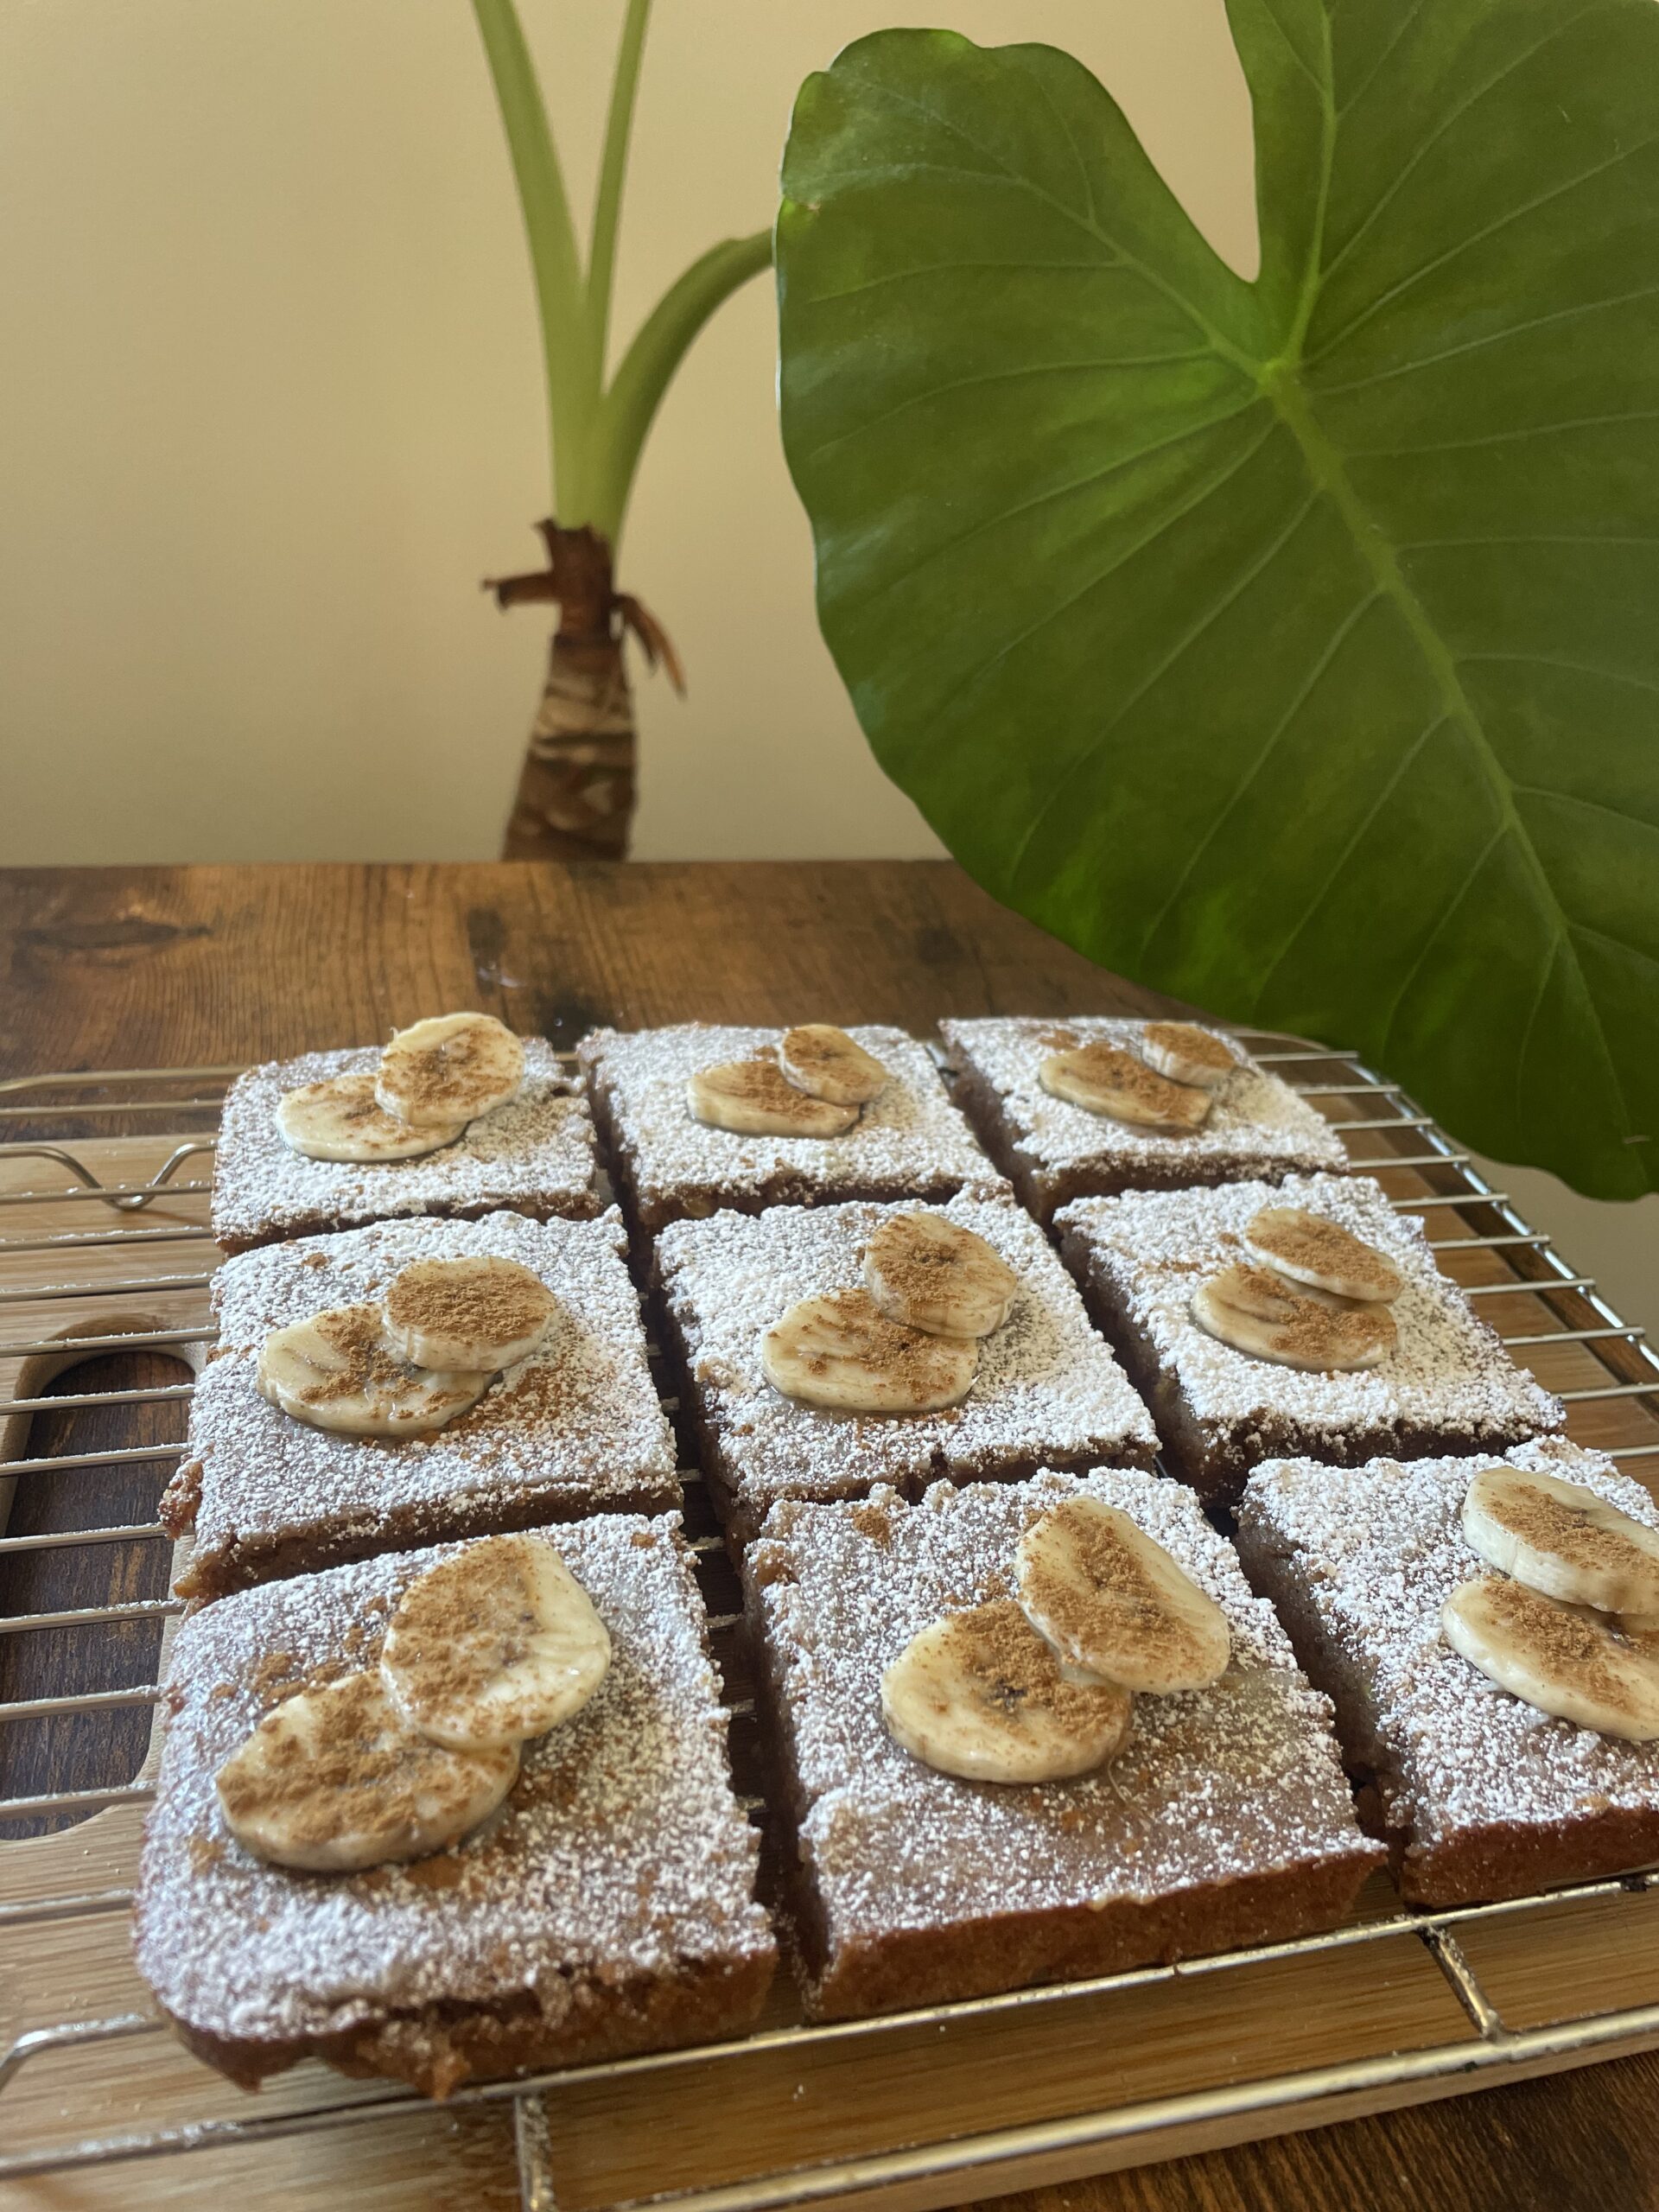
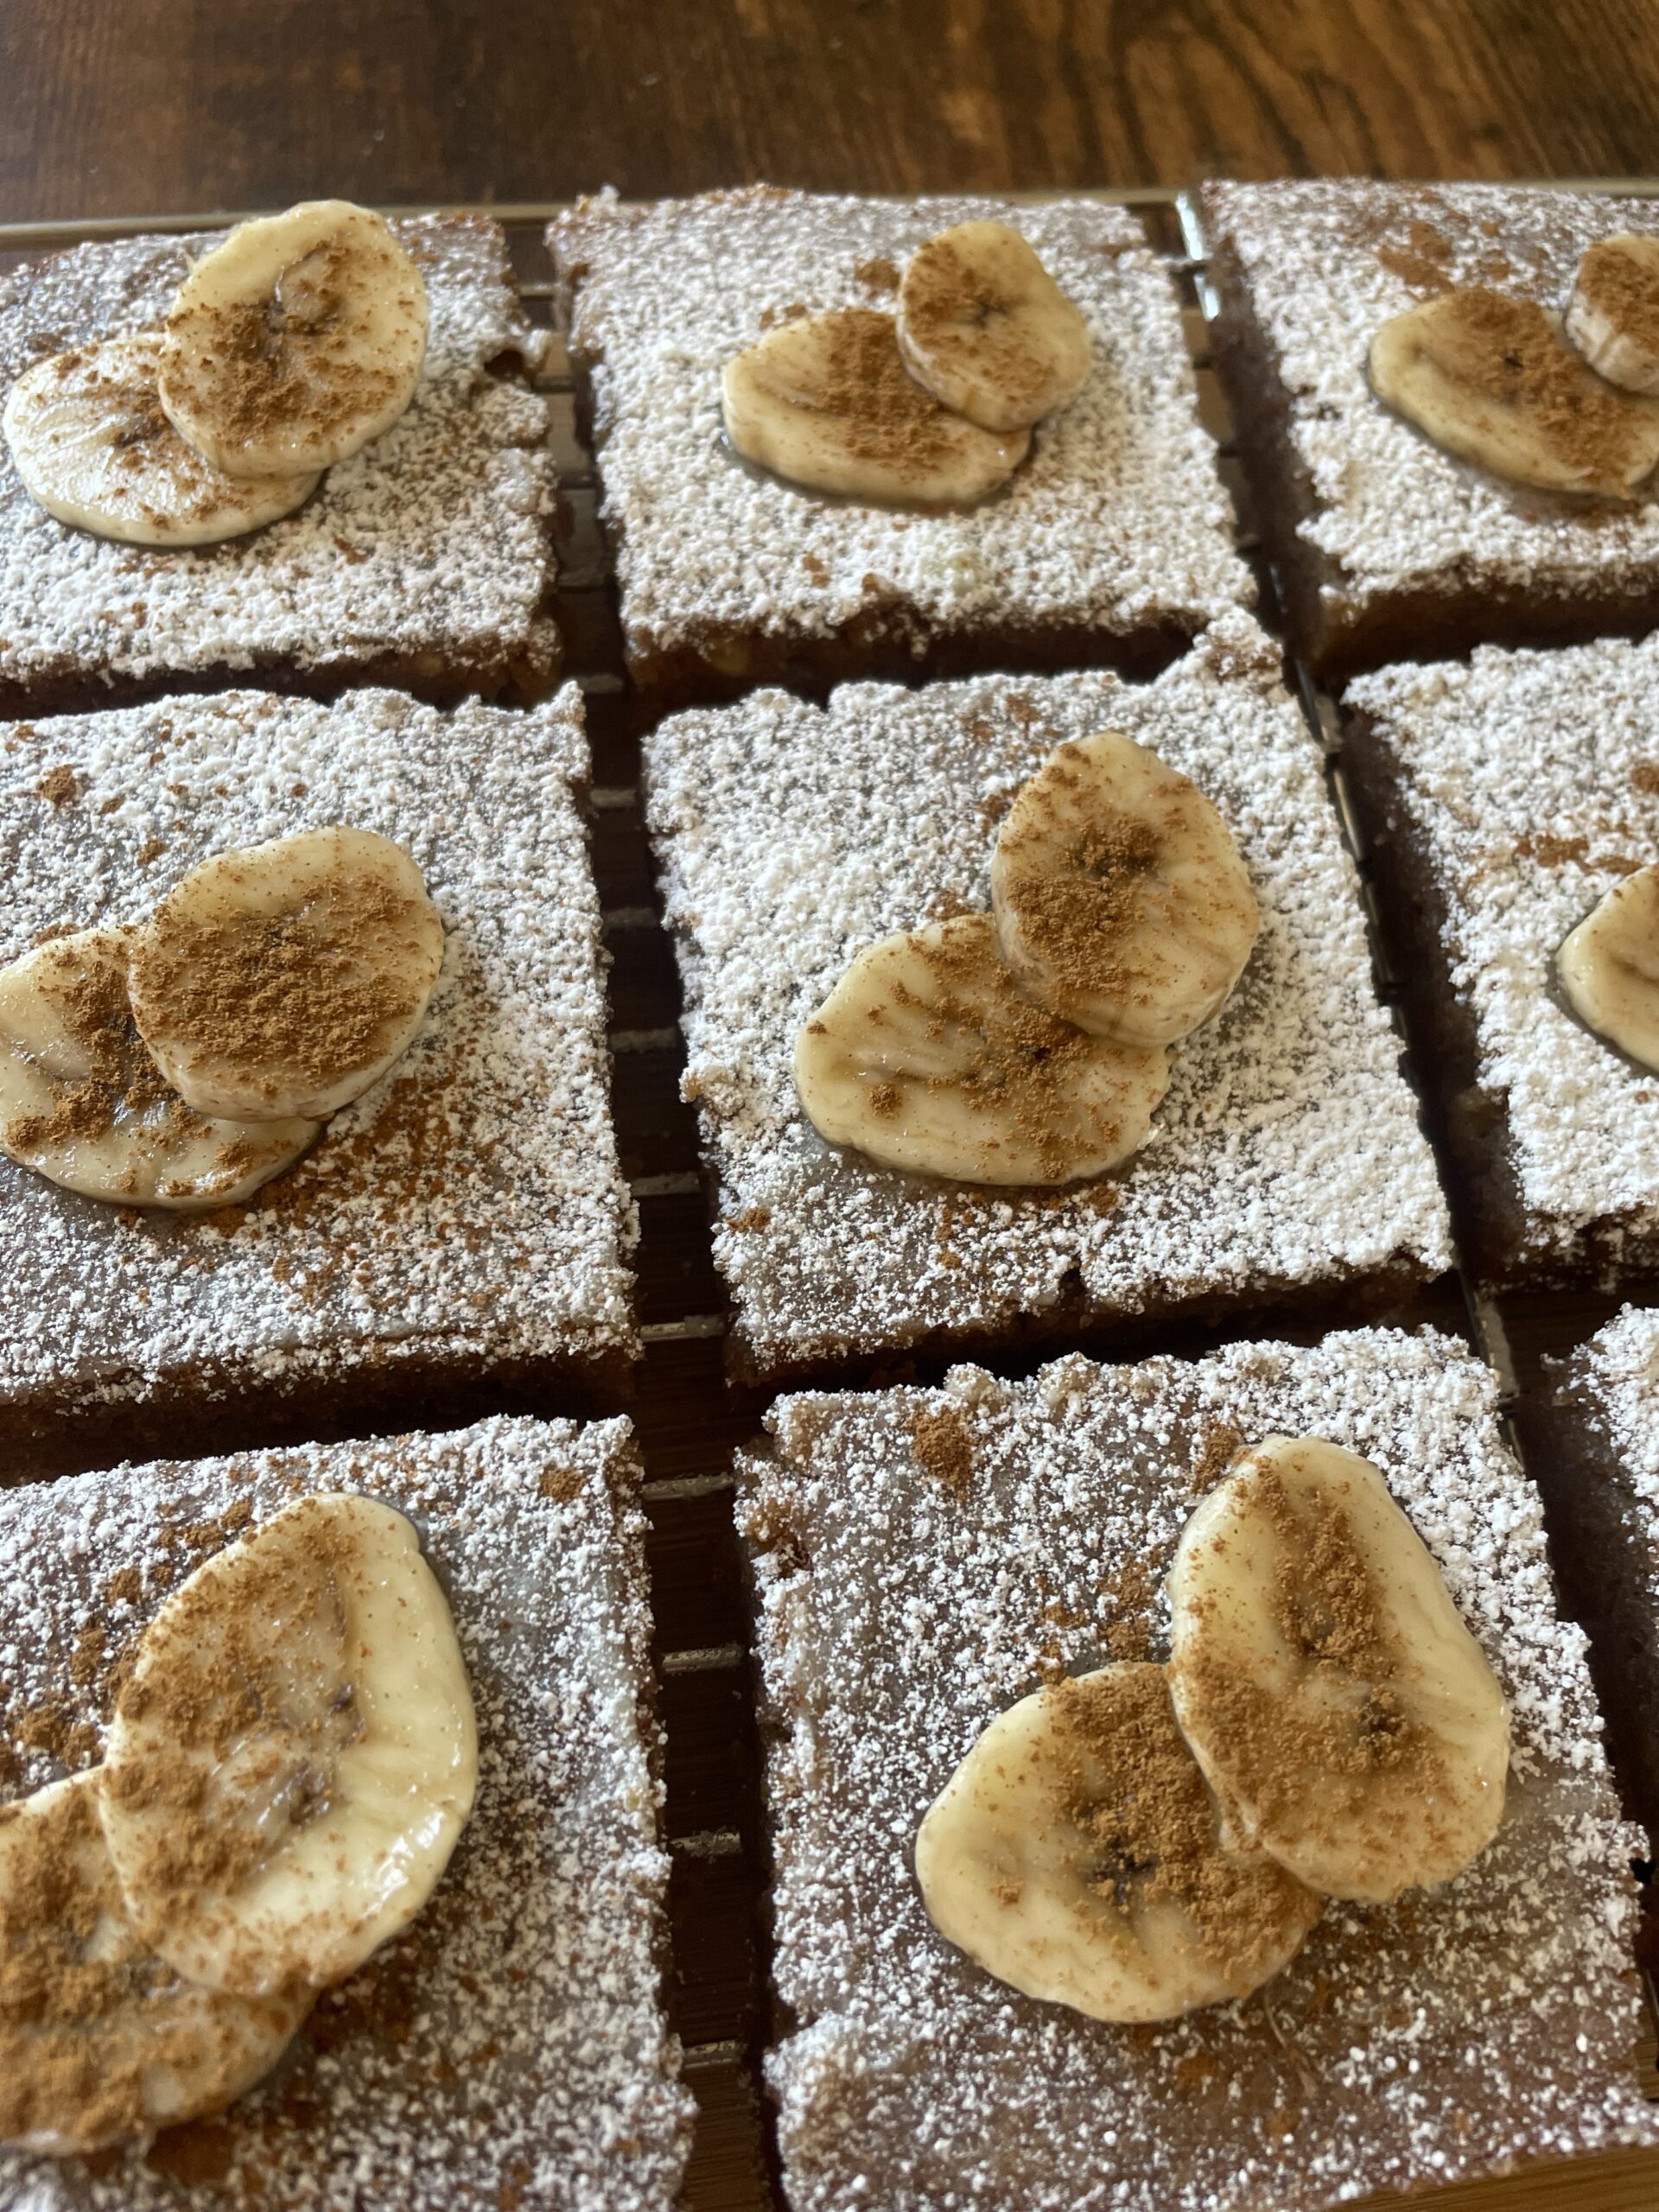
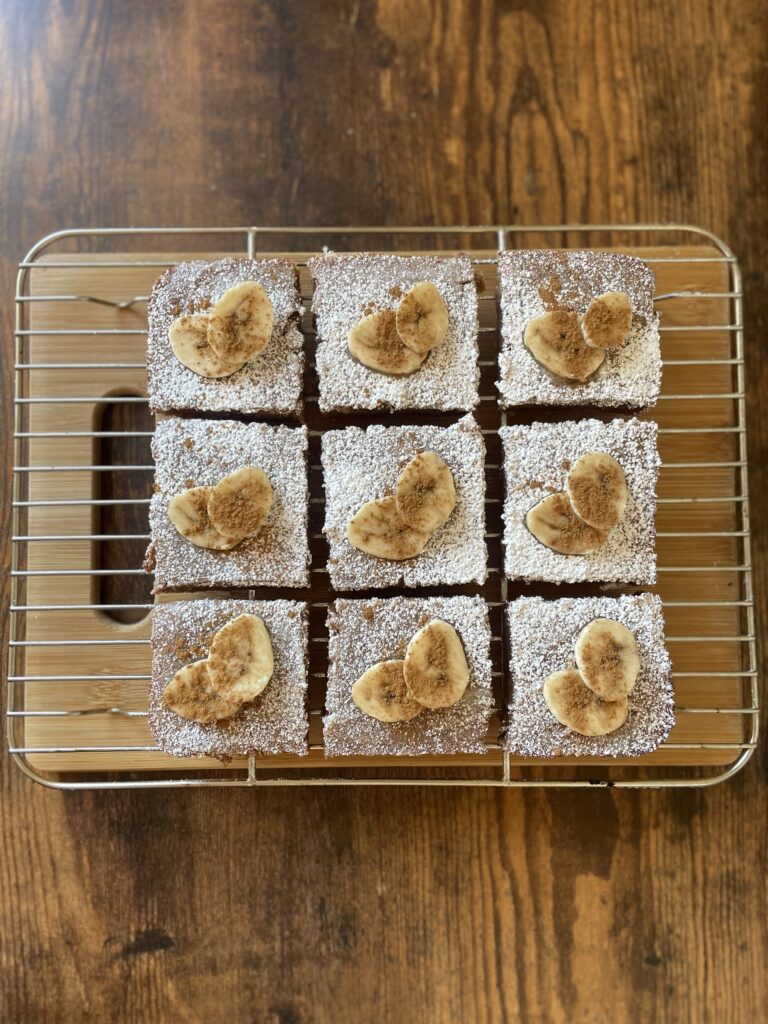
7. Frost and Serve:
-Spread the cream cheese icing generously over the squishies with the back of a tablespoon or a spatula.
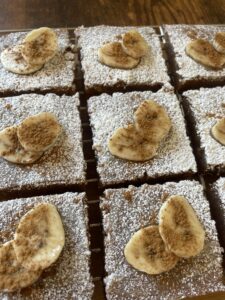
-Dust them with some icing sugar and cinnamon
-Decorate with banana slices
– Eat, Enjoy or store away in the fridge for up to 3 days


Step-by-step guide


This step-by-step guide—complete with photos—will help ensure you’re on the right track every step of the way.
Disclosure
1. I am in temporary accommodation and have a severe lack of baking equipment.
Sophie’s Squishie Squares


13. Put it in the oven for 15/20 minutes
14. Once cooked all the way through, remove from the oven and leave on cooling rack for 10/15 minutes
Topping – optional

2. Add the soft butter and mix until it’s absolutely combined.

Like what you see… give me a follow
Tips & Tricks
Knife: When cutting the quishies, use your sharpest knife to avoid squashing them. They are a sticky/stodgy mixture so having a sharp knife will keep the squares in tact
Pan/Dish: You can use whatever dish you wish however, if its too large then you will end up with more of a biscuit thin batter rather than a flapjack height
The butter: You want the butter to be soft but not melted! Get the butter out a couple of hours before you start to ensure it’s at the right temperature
Extras: Adding other things to this recipe is easy. If you know it goes well with bananas add it! Chocolate chips, Raspberries even nuts.

Easy to Make
Freezing Instructions: Bake the squishies fully and let them cool completely. I recommend not adding toppings before tightly cover the squishies up and pop then in the freezer. If you then decide you need a little treat get them out of the freezer and blast them in the microwave for 1.5 mins of a high setting. Don’t forget to save some icing in the fridge or simply melt some chocolate to put on top and or slap on some custard.
They can be frozen for up to 2 months.
To enjoy, thaw them overnight in the refrigerator, then warm them up before serving.
Last Updated on 29/12/2024 by Sophie

Weʼd Love to Hear You!
What cinnamon treat would you like me to try??